I HEART U – How to crochet a heart
Bare your heart to your lover by crocheting a heart for them! I have specially designed this heart that isn't too big to let your bear to hug it and gift it to your lover. This is an easy pattern provided that you have already attended our Tiny Rabbit Hole's Beginner (Level 2) workshops or equivalent! If you have not, feel free to visit our Youtube to learn how to crochet a simple round ball.
Materials
4 ply Acrylic Yarn in:
[Yarn A] Fire Engine Red (80)
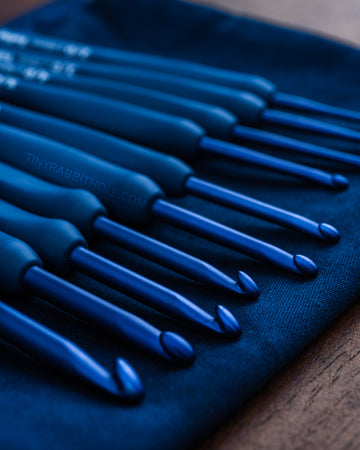
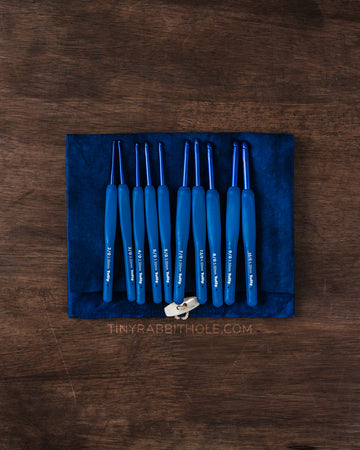
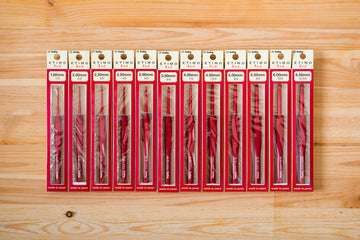
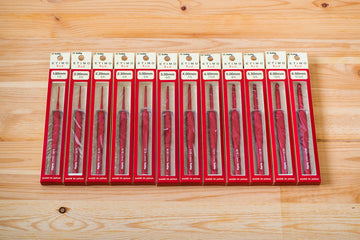
2.5mm 4/0 crochet hook
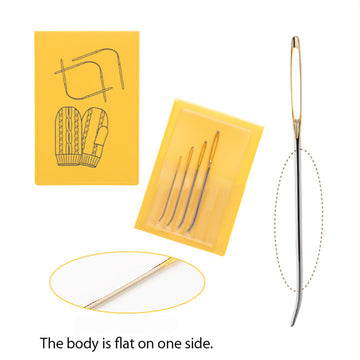
Yarn needle
Polyfiber stuffing
Stitch markers
Scissors
Abbreviations (US Terms)
st(s) stitch(es)
sc single crochet.....................x
inc increase..............................v
(do 2sc in the same st twice)
dec invisible decrease .............^
(combine 2 sts into 1)
Instructions
- Our amigurumi are mostly done in continuous rounds starting with a Magic Ring. You don’t need to end with a slip stitch. You should use a stitch marker to mark the last stitch of every round at all times.
- You may wish to download the Counter+ app to help you with your counting.
- Please crochet the stitches tightly to prevent stuffing from showing. However, do not crochet too tightly otherwise it’ll be difficult to continue
- Be sure to push the washer down only the first screw of the eye to prevent bulging.
- Always stuff your amigurumi firmly till the point that it feels bouncy.
- Always leave long tail for sewing.
Pattern
We're going to work on the one side of the heart first and combine them later on.
R1: sc 5 into Magic Ring (5sts)
R2: [inc] 5x (10sts)
R3: [sc 1, inc] 5x (15sts)
Leave a long tail and cut the yarn. We're going to use the tail to stitch the hole between the 2 humps later on.
Repeat R1-3 to create the 2nd hump. Do not cut the yarn as we are going to use this to complete the heart.
Now you have 2 humps, we'll be combining them to form the top of your heart. To where you have ended on your first hump, insert your hook into the next stitch where you have left off. Sc around in R4 to combine the 2 humps together.
R4-5: sc 1 (30sts)
R6: [sc 4, dec] 5x (25sts)
R7: [sc 3, dec] 5x (20sts)
R8: [sc 2, dec] 5x (15sts)
Start stuffing and continue stuffing as you go.
R9: [sc 1, dec] 5x (10sts)
R10: [dec] 5x (5sts)
Cut yarn and pull the yarn tail through the last stitch all the way. Sew remaining stitches closed and weave in all ends.
Sample Block Quote
Praesent vestibulum congue tellus at fringilla. Curabitur vitae semper sem, eu convallis est. Cras felis nunc commodo loremous convallis vitae interdum non nisl. Maecenas ac est sit amet augue pharetra convallis nec danos.
Sample Paragraph Text
Praesent vestibulum congue tellus at fringilla. Curabitur vitae semper sem, eu convallis est. Cras felis nunc commodo eu convallis vitae interdum non nisl. Maecenas ac est sit amet augue pharetra convallis nec danos dui.
Cras suscipit quam et turpis eleifend vitae malesuada magna congue. Damus id ullamcorper neque. Sed vitae mi a mi pretium aliquet ac sed elitos. Pellentesque nulla eros accumsan quis justo at tincidunt lobortis denimes loremous. Suspendisse vestibulum lectus in lectus volutpat, ut dapibus purus pulvinar. Vestibulum sit amet auctor ipsum.








شركة المتحدة
شركة نقل عفش بالخبر
شركة نقل عفش بالمدينة المنورة
شركة نقل عفش بالرياض
شركة نقل عفش بجدة
شركة نقل عفش بمكة
شركة نقل عفش بالطائف
شركة نقل عفش بينبع
شركة نقل عفش بنجران
شركة نقل عفش بخميس مشيط
شركة نقل عفش بجازان
شركة نقل عفش بابها
شركة نقل عفش ببريدة
شركة نقل عفش بالقصيم
شركة نقل عفش بتبوك
شركة مكافحة حشرات بالقصيم وكذلك شركة كشف تسربات المياه بالقصيم وتنظيف خزانات وتنظيف الموكيت والسجاد والكنب والشقق والمنازل بالقصيم وتنظيف الخزانات بالقصيم وتنظيف المساجد بالقصيم شركة تنظيف بالقصيم تنظيف المسابح بالقصيم
شركة مكافحة حشرات بالقصيم
شركة كشف تسربات بالقصيم
شركة تنظيف شقق بالقصيم
شركة تنظيف خزانات بالقصيم
شركة تنظيف فلل بالقصيم
شركة تنظيف منازل بالقصيم
شركة تنظيف كنب بالقصيم
شركة تنظيف سجاد بالقصيم
شركة تنظيف مجالس بالقصيم
شركة عزل اسطح بالقصيم
شركة تسليك مجاري بالقصيم
شركة تنظيف مساجد بالقصيم
شركة تنظيف وصيانة مسابح بالقصيم
شركة تنظيف الاثاث بالقصيم
شركة تنظيف موكيت بالقصيم
شركة تنظيف ستائر بالقصيم
شركة جلي بلاط بالقصيم
شركة تنظيف منازل بجدة
شركة تنظيف بالبخار بابها
شركات مكافحة النمل الابيض بابها
معلم تركيب سيراميك بينبع
شركة تنظيف بجدة
شركات تنظيف بالبخار بجدة
شركة نظافة بالحمدانية
شركة تخريم خرسانة برابغ
شركة تنظيف خزانات بالرياض
شركة تنظيف منازل بالرياض
نقل عفش بيش
شركة تركيب طارد الحمام بالدمام
دباب نقل عفش بجدة
ونيت نقل عفش بجدة
شركات نقل عفش حديثة بالطائف
نقل عفش بالطائف
شركة نقل عفش بالخبر
تطبيق نقل عفش
شركة تنظيف خزانات بمكة
شركة عزل خزانات بمكة
شركة تنظيف بمكة
شركة تنظيف شقق بمكة
شركة تنظيف بابها
شركة تنظيف كنب بابها
شركة نقل عفش بالاحساء
https://fullservicelavoro.jimdosite.com/
http://treeads.nation2.com/
https://jumperads.yolasite.com/
http://jumperads.nation2.com/
http://transferefurniture.hatenablog.com
https://atar-almadinah.weebly.com/
https://allmoversinriyadh.wordpress.com/
https://allmoversinriyadh.wordpress.com/2022/04/09/%d8%b4%d8%b1%d9%83%d8%a9-%d8%aa%d9%86%d8%b8%d9%8a%d9%81-%d8%a8%d8%a7%d9%84%d8%b1%d9%8a%d8%a7%d8%b6-%d9%85%d8%ac%d8%b1%d8%a8%d8%a9/
https://allmoversinriyadh.wordpress.com/2022/04/07/%d8%a7%d9%81%d8%b6%d9%84-%d8%b4%d8%b1%d9%83%d8%a9-%d8%aa%d9%86%d8%b8%d9%8a%d9%81-%d8%a8%d8%a7%d9%84%d8%b1%d9%8a%d8%a7%d8%b6/
https://allmoversinriyadh.wordpress.com/2022/05/13/%d8%b4%d8%b1%d9%83%d8%a9-%d9%86%d9%82%d9%84-%d8%b9%d9%81%d8%b4-%d9%88%d8%ba%d8%b1%d9%81-%d8%a7%d9%84%d9%86%d9%88%d9%85-%d8%a8%d8%a7%d9%84%d8%b1%d9%8a%d8%a7%d8%b6/
https://companymoversinjeddah.wordpress.com/
https://moversfurniture2018.wordpress.com/2018/12/30/%D8%A7%D9%87%D9%85-%D9%85%D9%83%D8%A7%D8%AA%D8%A8-%D9%88%D9%85%D8%A4%D8%B3%D8%B3%D8%A7%D8%AA-%D8%B4%D8%B1%D9%83%D8%A7%D8%AA-%D9%86%D9%82%D9%84-%D8%B9%D9%81%D8%B4-%D8%A8%D8%AC%D8%A7%D8%B2%D8%A7%D9%86/
https://moversriyadhcom.wordpress.com/
https://moversmedina.wordpress.com/
https://moversfurniture2018.wordpress.com/
https://moversmecca.wordpress.com/
https://khairyayman74.wordpress.com/
https://companymoversmecca.home.blog/
https://companymoverstaif.home.blog/
https://companymoverskhamismushit.home.blog/
https://whitear.home.blog/
https://companyhouseservice.wordpress.com/
http://bestmoversfurniture.wordpress.com/
https://companymoversjeddah.wordpress.com/
https://companycleaning307819260.wordpress.com/
https://companymoversriydah.wordpress.com/
https://ataralmadinah662300791.wordpress.com/
https://ataralmadinah662300791.wordpress.com/2022/02/05/%d8%b4%d8%b1%d9%83%d8%a9-%d9%86%d9%82%d9%84-%d8%b9%d9%81%d8%b4-%d8%a8%d8%a7%d9%84%d8%b1%d9%8a%d8%a7%d8%b6/
https://ataralmadinah662300791.wordpress.com/2022/04/12/%D8%B4%D8%B1%D9%83%D8%A9-%D9%86%D9%82%D9%84-%D8%B9%D9%81%D8%B4-%D9%85%D9%86-%D8%A7%D9%84%D8%B1%D9%8A%D8%A7%D8%B6-%D8%A7%D9%84%D9%89-%D8%A7%D9%84%D8%AF%D9%85%D8%A7%D9%85/
https://groups.google.com/g/moversfurniture/c/wwQFSNvgyAI
https://groups.google.com/g/moversfurniture/c/4L1oHETS4mQ
https://nowewyrazy.uw.edu.pl/profil/khairyayman
https://companyhouseservice.wordpress.com/2022/08/06/%d8%a7%d9%81%d8%b6%d9%84-%d8%b4%d8%b1%d9%83%d8%a9-%d8%aa%d9%86%d8%b8%d9%8a%d9%81-%d8%a8%d8%a7%d9%84%d8%b1%d9%8a%d8%a7%d8%b6/
https://ataralmadinah662300791.wordpress.com/ شركة الصقر الدولي لنقل العفش والاثاث وخدمات التنظيف المنزلية
https://movingsaudia.over-blog.com/
https://www.brush.bio/phimlautruytimlongdienhuong
https://www.brush.bio/phimlauanhtraisayxe
https://www.brush.bio/phimlauwicked2forgood
https://www.brush.bio/phimlaucuoivochocha
https://www.brush.bio/frankensteinvietsub
https://www.cohart.com/frankensteinvietsub
https://www.brush.bio/kyannghivietsub
https://www.cohart.com/kyannghivietsub
https://www.cohart.com/nuitevongvietsub
https://www.brush.bio/xemnuitevongvietsub
https://www.cohart.com/suthaygapsulayvietsub
https://www.brush.bio/xemsuthaygapsulayvietsub
https://www.cohart.com/tronchaytuthanvietsub
https://www.brush.bio/xemtronchaytuthanvietsub
https://www.cohart.com/quaithuvohinhvungatvietsub
https://www.brush.bio/quaithuvohinhvungatvietsub
https://www.cohart.com/khongbongtuyetnaotrongsachviet
https://www.brush.bio/khongbongtuyetnaotrongsach
https://www.cohart.com/oanhontrongvalivietsub
https://www.brush.bio/oanhontrongvalivietsub
https://www.cohart.com/lolemchoingaivietsub
https://www.brush.bio/xemlolemchoingaivietsub
https://www.cohart.com/gdragonincinemavietsub
https://www.brush.bio/xemgdragonincinema
https://www.cohart.com/tinhnguoiduyenmanhamvietsub
https://www.brush.bio/tinhnguoiduyenmanhamvietsub
https://www.cohart.com/xembaytienvietsub
https://www.cohart.com/avatarluavatrotanvietsub
https://www.brush.bio/avatarluavatrotanvietsub
https://www.cohart.com/xemmetvietsub
https://www.brush.bio/100metvietsub
https://www.cohart.com/godzillatrumotvietsub
https://www.brush.bio/godzillatrumotvietsub
https://www.cohart.com/thaichieutaivietsub
https://www.brush.bio/xemthaichieutaivietsub
https://www.cohart.com/traitimquequatvietsub
https://www.brush.bio/traitimquequatvietsub
https://www.cohart.com/caimavietsub
https://www.brush.bio/xemcaimavietsub
https://www.cohart.com/bitmatbatnaivietsub
https://www.brush.bio/xembitmatbatnaivietsub
https://www.cohart.com/cucvangcuangoaivietsub
https://www.brush.bio/cucvangcuangoaivietsub
https://www.cohart.com/teeyodquyantang3vietsub
https://www.brush.bio/xemteeyodquyantang3vietsub
https://www.cohart.com/chainsawmanthemoviechuongreze
https://www.brush.bio/chainsawmanthemoviechuongrezevietsub
https://www.cohart.com/xemtuchientrenkhongvietsub
https://www.brush.bio/xemtuchientrenkhongvietsub
https://www.cohart.com/phimlaumuadovietsub
https://www.brush.bio/phimlaumuadovietsub
https://www.cohart.com/jujutsukaisen0chuthuathoichien
https://www.brush.bio/jujutsukaisen0chuthuathoichienvietsub
https://www.cohart.com/shincaubebutchinongvietsub
https://www.brush.bio/shincaubebutchinongvietsub
https://www.cohart.com/lamgiauvoima2vietsub
https://www.brush.bio/lamgiauvoima2vietsub
https://www.cohart.com/thanhguomdietquyvohanthanhviet
https://www.brush.bio/thanhguomdietquyvohanthanhvietsub
https://www.cohart.com/thanduocvietsub
https://www.brush.bio/xemthanduocvietsub
https://www.brush.bio/120bahadurhinddidubb
https://www.cohart.com/bahadurhinddidubbed
https://www.brush.bio/mastiii4hinddidubb
https://www.cohart.com/mastiii4hinddidubb
https://www.surveyking.com/survey/w27dc
https://profile.hatena.ne.jp/derideritoro/profile
https://b.cari.com.my/forum.php?mod=viewthread&tid=5515798&extra=
https://ctxt.io/2/AAD4-sT9EQ
https://www.onlinegdb.com/fork/8RIcFDwlt
https://pastebin.com/0xc048mx
https://freepaste.link/ljeomtizaz
https://movie24h.info/
https://movie24h.info/contact
https://movie24h.info/huayThai
https://portfolium.com/entry/top-7-2025-3
https://portfolium.com/entry/truett-person-645-100
https://portfolium.com/entry/top-10-100
https://portfolium.com/entry/top-7-2568
https://portfolium.com/entry/top-7-2025-2
https://portfolium.com/entry/jackson-williams-30129725
https://portfolium.com/entry/thunder-thunder-100
https://portfolium.com/entry/top-4-2025
https://portfolium.com/entry/top-10-25
https://portfolium.com/entry/hehjdjdj-hehjdjdj-100
https://portfolium.com/entry/top-7-2025-1ฟ
https://portfolium.com/entry/top-7-2025
https://portfolium.com/entry/nsjdjdkd-wiwkkwlw-1ฟ00
https://portfolium.com/entry/balmiki-kumar-100
https://portfolium.com/entry/1-261
https://portfolium.com/entry/cucu-darna-2025
https://portfolium.com/entry/1-260
https://portfolium.com/entry/1-259https://portfolium.com/entry/top-10-24
https://portfolium.com/entry/rioqrandy-rioqrandy-2025
https://portfolium.com/entry/sidiidf-sisieiiw-2025
https://portfolium.com/entry/1-256
https://portfolium.com/entry/balmiki-kumar-30129725
https://portfolium.com/entry/top-7-2568-1
https://portfolium.com/entry/jjskkd-ejejjf-100
https://portfolium.com/entry/1-264
https://portfolium.com/entry/top-7-2025-5
https://portfolium.com/entry/top-7-2025-4
https://portfolium.com/entry/1-266
https://portfolium.com/entry/top-7-2025-6
https://portfolium.com/entry/1-267
https://portfolium.com/entry/sadil-sultn-2568
https://portfolium.com/entry/amel-darna-2025
https://portfolium.com/entry/top-7-2025-7
https://portfolium.com/entry/evan-darna-100
https://portfolium.com/entry/1-270
https://portfolium.com/entry/top-7-2025-8
https://portfolium.com/entry/ade-rizki-30129725
https://portfolium.com/entry/top10-20
https://portfolium.com/entry/1-271
https://portfolium.com/entry/top8
https://portfolium.com/entry/1-272